Alcohol soaking method for drying bowls
by Dave Smith
Background:
Drying roughed turned bowls has always been a challenge for wood turners. You need to balance the desire to finish a piece as soon as possible with the inherent tendency of wood to warp and split when dried too quickly. Wood turners have employed various methods to maximize the drying speed while minimizing the degradation of the wooden shape being created. Over time each method has collected its own supporters and detractors with respect to the relative effectiveness of the process.
Criteria for a good drying process include ease of use, cost, and consistency of results. A process that is difficult to use, even though it produces good results, will garner few adherents. Likewise, an expensive protocol may appeal to a commercial turner who can expect to recoup the investment but it may be cost prohibitive for the average wood turner. Consistent results without labor intensive monitoring or manipulations are a major benefit of any method.
The most common method of drying wood bowls is placing them in a paper grocery bag. The theory is that the permeable paper produces a micro climate around the bowl. The bowl dries slowly with a small differential moisture gradient across the bowl sides. This method works well but it is slow.
Boiling can improve the stability of the wood by rupturing the cells, allowing moisture to more readily migrate to the surface and evaporate. Boiling is time and labor intensive, consuming requiring considerable space for a large pot and heat source. Since most people don't want to boil bowls in the kitchen, it is necessary to set up some way to boil outdoors which can be a big drawback in cooler climates during the winter months. Boiling can also be dangerous. A good friend of mine was severely burned when a plate blank wedged in a boiling pot of water, sealed the pot and led to a steam explosion.
Soap soaking has gained popularity in recent years. A bowl soaked in a soap solution is supposed to be easier to turn because of the lubricating action of the soap. Bowls are said to dry faster and crack less after soaking but some people report that there is still a fair amount of distortion of the finished piece.
It was my experience with soap soaking that led me to the alcohol soaking procedure I use today. When I researched soap soaking and read the discussions on wood working forums, the consensus was that it was the surfactant in soap that allowed the wood to dry faster.
Researching the MSDS (material safety data sheets) for several commonly used soaps revealed that the surfactants were listed as being alcohols. I reasoned that using alcohol for a soaking solution might be a simpler method. The most readily available alcohol is denatured alcohol found in the paint section of any hardware store. A gallon of denatured alcohol costs from 10 to 12 dollars.
A search on the internet noted several instances of alcohol soaking of archeological artifacts to displace water in a complicated protocol for stabilizing and preserving historical wood pieces. Alcohol soaking is used as the first step in of a process to replace water in the wood with a stable inert binder that will maintain the shape of the artifact and prevent further degradation. The fact that alcohol is used to displace water in archeological artifacts suggests that it might also work to displace water in green wood thus speeding up the drying process.
My testing involved a large variety of wood species. In each case, the results have been consistently good. Types of wood included some traditionally hard to dry woods such as apple, plum, cherry and mulberry.
The test consisted of turning two similarly sized bows from the same type wood. One bowl from each sample was soaked in alcohol then both were dried in the same manner. Several methods of drying were used from the most conservative, a paper bag, to the most radical of placing the bowls uncovered on a wire rack in my heated, dehumidified shop. I recorded the weight, date and time when the bowl was set aside for drying and then recorded the weight daily when possible. After the bowl stopped losing weight it was considered dry or at equilibrium with the surroundings. The data showed that small thin (1/2 inch thick walls) bowls would reach equilibrium in 4 to 5 days. Using this data, I developed a process that was quick and consistently yielded usable bowls.

Here is a set of roughed out apple bowls that were cored from the same block. After more than a year they are still in good condition and ready to turn when I get a chance.
The Process:
Bowls are roughed out to 1/2 inch wall thickness for pieces less than 8" in diameter. Over 8" in diameter, I leave a wall thickness of 5/8 to 3/4 inches. Since my lathe is limited to 12 inches, I have not tested bowls larger than that for optimum wall thickness. I often turn utility pieces with a finished wall thickness of a quarter to half an inch. In these cases the roughed out wall thickness needs to be thick enough to allow for distortion. No drying method will completely prevent movement of the wood when it dries, so plan your roughed out blank accordingly.
Once the bowl is roughed out it is submerged in denatured alcohol for at least 2 hours. Larger, thicker bowls need to soak longer to ensure good penetration of the alcohol. Longer soaking time does not appear to damage the wood.
Now wrap the outside of the bowl in heavy paper such as a grocery bag. Secure the paper with a couple of wraps of masking tape around the rim. Fold the paper over the rim, trim off the excess, and place the bowl upside down on a rack to dry. If the bowl set on the foot it may not rest evenly due to the paper and the air may not circulate as well. The inside of the bowl needs to be exposed to air.
The reason for wrapping the outside only is the theory that it will create a compressive stress on the bowl by drying the inside quicker than the outside. As the inside dries it shrinks which pulls on the outside causing it to compress. This compressive force minimizes cracking during the drying process. Thinner walls yields less distortion and fewer cracks by decreasing the maximum stress developed between the inside and the outside.
The alcohol I use for soaking bowls is denatured ethanol alcohol, straight from the can. I do not recommend methanol due to health and safety concerns. Although I did sucessfully test some bowls in isopropyl alcohol I did not like the smell. Isopropyl is not readily available in concentrations greater than 70% while denatured ethanol normally is 95%. Alcohol is added to a container as needed to cover pieces. During soaking, some alcohol will be absorbed, so a small amount will be lost when each bowl is removed and must be replaced with fresh alcohol. Because of this I have not worried about the dilution of the solution over time. The results have been consistent for bowls soaked in fresh alcohol and those soaked in solution used many times.
One concern was the possibility that alcohol used to soak dark wood would become a dye and discolor lighter colored wood subsequently soaked in the solution. There has been no indication of this happening.

The solution does collect wood dust and other debris over a period of time, so I strain the solution when transferring between containers. A kitchen strainer place across a container with a paper towel filter is sufficient to remover the big hunks.
Containers used for storing soaking alcohol should be non metallic. Alcohol is about 95% alcohol and 5% water when purchased. As bowls are soaked in it, the moisture content of the solution will increase, which, along with other impurities leached from the wood will attack metal containers.
I use plastic ice cream containers for soaking bowls and storing used alcohol. A one gallon container will accommodate a bowl 8" in diameter by 5" tall. A two gallon ice cream container will hold a turning 8 1/4" in diameter and nearly 10 inches tall.
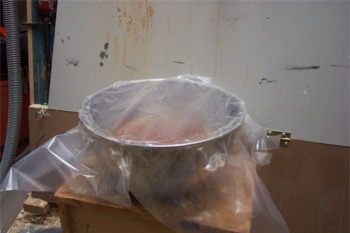
For larger bowls, a 13qt stainless steel bowl will accommodate 13" diameter bowls that are less than 6" from the rim to the bottom of the foot.
To cover a large bowl, place a sheet of heavy plastic film over the steel bowl and secure it by wrapping the rim with clear packing tape. If you stretch the tape, the cover can be removed and replaced as needed while providing a reasonably good seal.
Still larger bowls can be placed in a heavy plastic bag and then nested into a pile of shaving to conform to the bottom of the bowl and limit the amount of alcohol needed to cover the bottom. The inside of the bowl can also be filled to reduce the volume of alcohol needed to completely cover the bowl. With a little bit of ingenuity the amount of alcohol required to process large bowls can be held to a reasonable quantity.
Other Trials:
In order to verify the results I had obtained with alcohol soaking, I asked several other tuners to try it. I wanted to get a cross section of turners with different experiences and specialties. Some of those who provided data included Bill Grumbine, Dominic Greco, Mark Kauder, and Jennifer Shirley.
Mark Kauder has used the method for 3 bowls, two from box elder and one from sycamore. He bought a slab of freshly cut Ambrosia Sycamore, 4" thick and not sealed. He cut three 16" diameter blanks from it, roughed them out, then used the alcohol soaking method on one of them while completely covering the other two with Anchorseal. When he later pulled them out, the Alcohol Soaked on seemed dry, and had warped only about 1/2" across the grain. When he turned it, it was dry, and has not moved since. The two Anchorsealed ones had both warped/shrunk 1" across the grain and had "Potato chipped" or cupped about 1/2". After chucking them up and getting them round again, they still continued to move. Mark reports he will use the alcohol soaking method when he turns solid Wood.
Dominic Greco has completed more than a dozen pieces using the alcohol soaking process. He has used the process on many types of wood including; Box Elder, Norway Maple, Osage Orange, Cherry, Chinese Elm, and Apple. When asked what the worst problem was Dominic responded, "The piece of Osage Orange cracked during drying, but I believe this was a crack that was present in the blank, and not a direct result of drying". Dominic uses a moisture meter to determine when a bowl has completed drying. After 2 weeks he reports that his pieces are at a moisture content of 6%. None of his finished pieces have distorted as of the writing of this article, and Dominic reported that it is now the only method he uses for drying bowls.
Bill Grumbine used the alcohol soaking method in late 2003 to fill Christmas orders he received during a Thanksgiving artist show. Bill has been an enthusiastic supporter of the method.
Jennifer Shirley soaked one walnut bowl before reading the fine print as, she calls it, and left it in the alcohol for four days. When she removed it, she simply left it on a shelf exposed to air. Four months later the bowl exhibited no problems other than the normal out of round when she finished turning it.
Conclusions:
Although I collected data in a consistent manor and attempted to control variables, this is not a strict scientific study. The study did not verify my theory of why the process works. The study does show that soaking green roughed out bowls in alcohol does reduce the time necessary to bring them to equilibrium with their surroundings. Wrapping the outside of a bowl reduces distortion and checking. Testing by other wood tuners has verified that the protocol works consistently. The process is simple and relatively fast. The expense of denatured alcohol is minimal compared to the savings in reduced bowl losses, but the biggest saving is time. Using the alcohol soak method reduces the drying time for roughed out bowls from months to weeks.
. . . Dave Smith
 © 2003 by Dave Smith . All rights reserved.
No parts of this article may be reproduced in any form or by any means
without the written permission of the author.
© 2003 by Dave Smith . All rights reserved.
No parts of this article may be reproduced in any form or by any means
without the written permission of the author.


 The limb was about 2 ½" in diameter. As you can see the limb was not straight so I expected the stem would warp when drying.
 Bowl thickness is about 3/8"
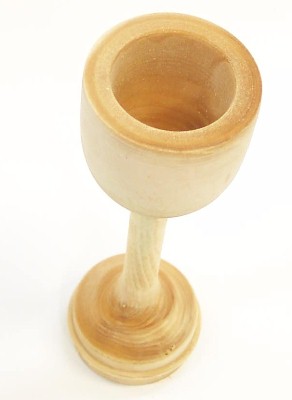

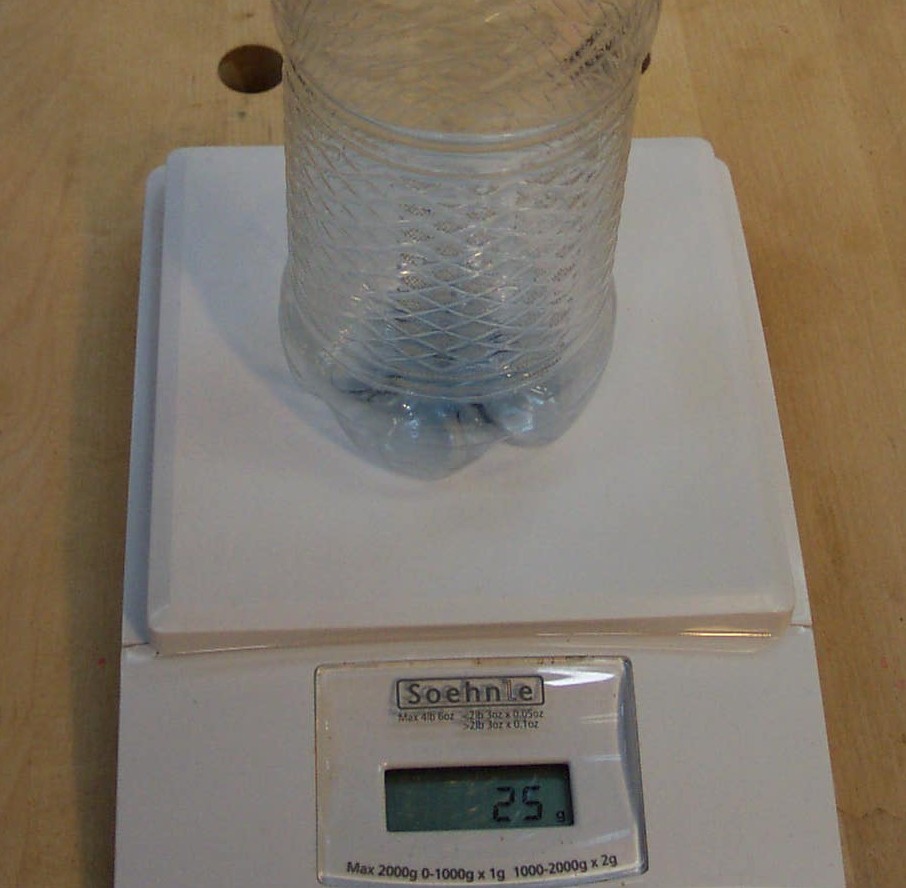
 The goblet is weighed.
 Placed upside down on a rack for drying.
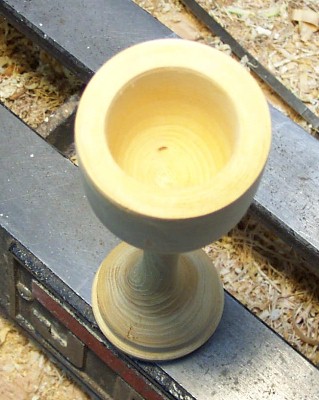 The bowl did not distort very much.
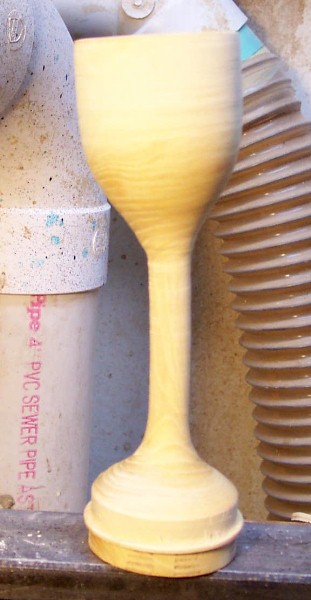 Since the pith was in the stem I figured the stem would warp and I was not wrong.
 With the tool rest set at the center line I adjusted the goblet to have the stem centered.
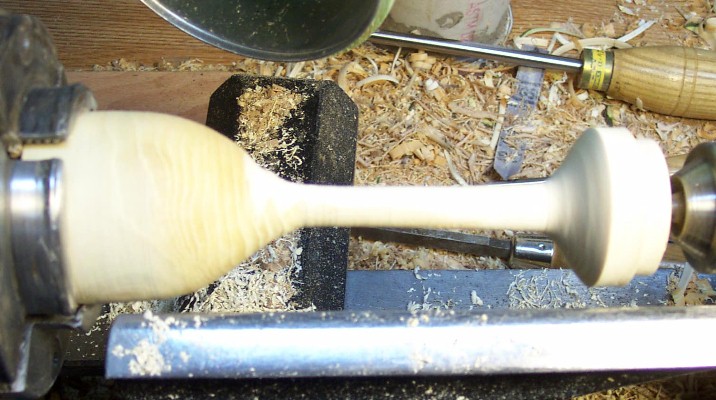 Bottom and stem are rounded.
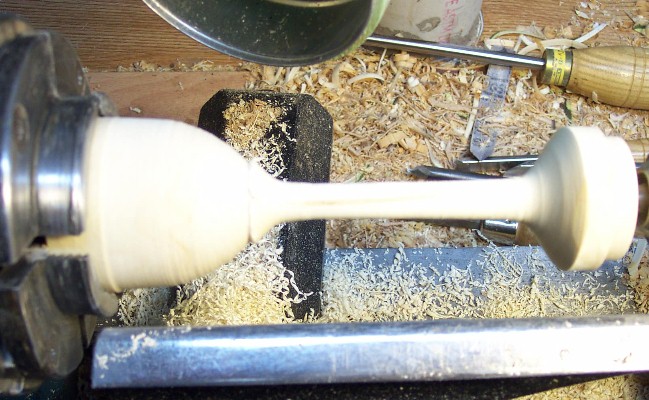 After further refinement of the stem the pith is revealed.
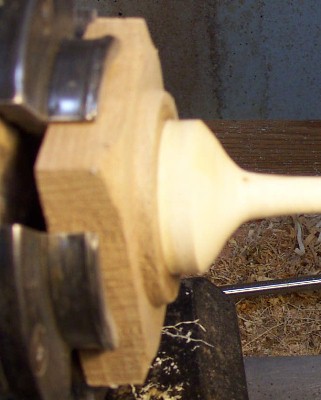 Tenon is glued into a waste block mounted in the chuck.
 Steady rest provided stability for finishing the inside.
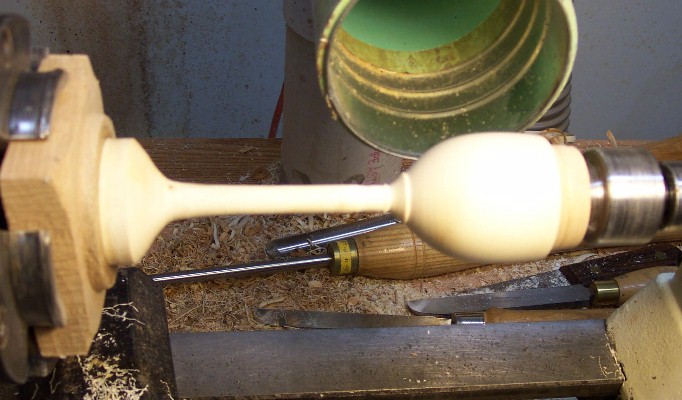 Goblet is stabilized with a wooden plug on the live center.
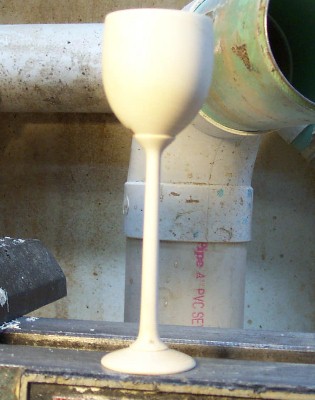 Unfinished goblet stands straight and tall.