Turner feedback on alcohol soaking
The following is some of the feedback I have received from turners that have tried using the alcohol drying process. I will add more responses as time permits.
I had to start the post with my favorite feedback message because of this one sentence, "I have been using the paper bag and wet chip system for some time and last week took 2 cherry bowls out to check them and threw them in the burn pile." That pretty much sums it up for me.
Dave I have started using the alcohol soak. I have about 6 bowls wrapped now and finished one cherry bowl. 14" and 2 1/2 deep. Soaked it for 3 hours and set aside for a couple of weeks. Last night I unwrapped it and was surprised it did not look like a potato chip. I have been using the paper bag and wet chip system for some time and last week took 2 cherry bowls out to check them and threw them in the burn pile.
The one I soaked had no cracks and did not warp much at all. I had no trouble retruing the bowl what so ever. I have a oak burl and 4 walnut bowls drying now.
Will keep testing and let you know. As of now I love the system.
Dick Hines
Dave, here are my results of my experience in drying green, rough turned bowls using your method involving Denatured Alcohol. To say I have been impressed with the success of this method would be an understatement. Listed below are the techniques I have found that have provided excellent results for me.
To date, I have roughed and dried, from green turning stock approximately 45 bowls. (There may be a couple that snuck by me when keeping track of my progress.) ;-)
Species: Using the Alcohol Drying Method, I have dried the following with excellent results:
Apple - Both Crabapple and Fruiting Tree Wood
Ash - Green Ash, White Ash
Beech
Box Elder
Bradford Pear
Cherry - Black Cherry and Pin Cherry
Cedar - Eastern Red Cedar
Dogwood - 1 small piece
Elm - Chinese, Red
Hawthorn - Washington, Cockspur
Maple - Silver, Norway, Red
Osage Orange
Sycamore
Walnut - Black
Problem Species: The only problems I have experienced using the Alcohol Drying Method have been with Ash and Walnut. I have roughed, soaked and dried about 8 Ash Bowls, and I have had some cracking in the end grain area of each bowl. To date, only one has been severe enough to not be able to turn the cracks away during the finish turn. Most of the cracking is light, and shallow. I have different wall thickness on my rough turned bowls, but it seems to make little different. All of the Ash Bowls have been above 6" in size. I have one Natural Edge Ash Bowl drying that showed cracking within 8 hours of removal from the Alcohol. One Walnut Bowl has some end grain cracks as well, but I have hopes they will turn away during the finish turning process.
Wall thickness: I think it is very important in the success of this drying process to pay attention to wall thickness of your rough turned items. On bowls up to 6" in diameter, I try to maintain a 3/8" to 1/2" wall thickness on the rough turned bowl. I have found on some species, where movement is limited, that is not necessary, and on other species, like Apple, it is essential to have good thickness due to the severe movement of that species.
On larger bowl, of which I have used the Alcohol Drying Method on bowls up to 15" in diameter, I try to maintain a wall thickness of 5/8" up to 1", depending on the species. (As a side note to the Ash bowl cracking problems, those were all larger bowls, in excess of 6", and had thick walls, at least 3/4 or more. I think wall thickness, in this case too thick, is a direct contributor to the cracking I have experienced. Others I have talked with have dried Ash with no problems.)
My Process: Here is the process I use drying my green, rough turned bowls using a Denatured Alcohol Soak.
My blanks are cut round on the Band saw, and turned right away. I rough turn the bowls, and either blow them clean with air, or brush away any dust and shavings, to help keep the Alcohol debris-free.
I submerge the rough turned bowl in Alcohol immediately after they are rough turned. If they tend to float, I use scraps of Corian placed in the bowl to hold them under the Alcohol. I soak the bowls standing upright, as they would be when finished.
I soak all of my rough turned, green bowls a minimum of 24 hours. This is mostly due to convienience for me. If I turn a bowl on a weekday evening, I soak it, and remove it the next evening after work. On the weekend, I just remove it the next day, but it is more times than not a 24 hour soak. My results have been so good, I will continue this timeline.
Upon removal of the bowls from the Alcohol, I wipe the exterior surface lightly with a paper towel, or shop rag. I wrap my bowls immediately using brown grocery bag paper, and I secure the paper with one wrap of masking tape around the exterior of the bowl, near the rim. I always make sure the paper is folded tightly over the rim in into the inside of the bowl about 1/2" to 1" or so. I trim away any excess paper inside the bowl that could impede proper air circulation.
I dry my bowls on a plastic shelving unit that has grate-like shelves with large openings. The bowls are dried bottoms up, with the interior facing down, like Dave suggests. I also write the date on the masking tape on each bowl, so I know when it was removed from the Alcohol for drying. I have finish turned small bowls in as soon as 6 days of drying, but I now wait at least 2 weeks, and I have been unwrapping the bowls after 14 days and letting them air dry "naked", facing down, for another week, or when I can get to them. I find no problem doing it this way, as the bowls are dry enough after 2 weeks to be problem free. Another thing I think contributes to the success I have had using Dave Smith's Alcohol method is the environment where I dry my bowls. I have a basement shop, and I feel that the conditions in my basement are perfect for drying these Alcohol soaked bowls. It stays cool, without a lot of air circulation directly on the bowls. The humidity is constant, but not really high, as I use a dehumidifier. The humidity is still a bit high though, as it is in most basements. With a dedicated shop in the plans, I will still be drying my Alcohol soaked bowl in my basement, as I think the environment there is ideal for the task.
In summary, I have had what I consider excellent results in drying rough turned, green wood using this method. Some of the wood I have used this on was turned as soon as 1 day after being harvested, and without saying, it was VERY wet. Literally "dripping wet" in some instances. I have had very little movement in the finished bowls I have turned using Dave's method. The bowls that did exhibit some movement were turned before a minimum 2 week drying period. Some of the historically "difficult" woods to dry, Sycamore and Apple come to mind, have been the most problem free for me. On the bowls that I have allowed 2 weeks or more for drying before the finish turn, have had no movement, or movement that is hardly discernable.
Dave Smith should be highly commended for bringing this technique to the turners of the world. It is very effective, and I will not turn green wood without an Alcohol Bath waiting. This method helped me fill last years Christmas Bowl Orders before the holiday deadline, of which would have never been possible otherwise. This has brought much joy and satisfaction to my "turning affliction", and I am forever grateful for the foresight and work Dave has put into this technique. I am even more grateful for Dave's visit last October when he told me about this process. I have been using this method since, and I will use it as long as I am turning. Good Lord willing, that will be a long time!
Thanks Dave!!!!!!, you have made a pleasurable experience just that much more enjoyable. For that, I offer my heartfelt thanks!
Dave,
I tried other suggestions for drying such as dishwashing detergent, and boiling. I did not have a lot of success with these methods so I went back to coating my bowls with Anchorseal and setting them aside to dry for a long time span. When I heard about your new method I decided to try it because of the reliable turners that had used it for a year, and recommended it. I have had remarkable success with it, recommended it to fellow turners, and as you know I let turners know about it on the web. I appreciate your work in developing the method of using DNA, and letting us know about it, and I am impressed you did all of this with no profit comming to you. Thanks Dave, from South Georgia. If you are ever in this neck of the woods stop by and visit.
Glenn Hodges
Nashville, Ga
Hey Dave.
I've been using your alcohol soaking protocol for several months with great success. When I came across a Pear downed by hurricane Katrina, I snatched it up. It had a cluster of 2 crotches side by side that I just had to try a hollow form from the entire cluster. I'm not sure if you remember me posting it on SMC and the WOW sites. To me, it was the ultimate test for the alky soak, and it worked like a charm! The turning has a total of 6 piths around the circumference, every single one came through perfectly intact. I was discussing it with Jim Ketron in chat, and told him it could be the poster child for alcohol soaking. I just wanted to drop you a line of Thanks again, for bringing this out.


Sure, you have my permission to put it on your site, that would be great. The finished size ended up at 10.5" in diameter x 5.5" tall, with wall thickness just over 1/4". I had roughed turned the walls between 1/2" and 5/8". It was soaked about 24 hrs. If I'm not mistaken, it was a total of 17 days from the time I wrapped it until I took the finished pics.
Travis Stinson
Hello,
My name is Jeff, I am from Massachusetts, I found your site about a year ago. You know looking for a way to dry wood faster and effectively, ethanol alcohol works very well. I've done big bowsl to vessels, big and small. I just wanna say Thank You!!! for putting up such useful information! I could not find ethanol any where that had it in 95% or better. I had to go on line and order it $135.00 for 5 gal. The only problem wood I had was modrone burl from OU, but that was do to human error not the ethanol.
Thank You again,
Jeff
For the last month I have been using the DNA method for drying and wanted to pass along the results.
Quantity 11 bowls rough turned 1" thick for every 12
" in diamiter. Placed in bucket of DNA overnight, then one hour drying on rack, then bottoms covered in craft paper placed upside down for 2 weeks.
Wood used Maple, Birch, Chestnut, Mohagany.
Results: on all pieces noticed less wood movement, all dry after 2 weeks, one piece of birch cracked alittle, but not sure if the crack was already there or not.
This is my new preferred method and will use this now on for green turnings. I get quite a bit of free green wood and now always have dry rough turnings to finish is great.
Just a little info to pass on.
Larry
Yakima, WA.
I read your article over at WoodCentral 'bout a year ago on using DNA, experimented around with it, and have used it countless times since. I also introduced it to a number of our club members in a Saturday demo I did on drying wood. Even had a chemist friend at the demo (when mentioning 'bonding water and alcohol I needed someone much smarter than me :)
Your process has worked amazingly well for me.
Sorry, didn't mean to ramble on in the ad area (did I mention I am totally impressed with your process/work :)
6/2/2006
And you are more than welcome to add my post to your blog.
I would add pictures but the bowls I have completed have (happily) been sold
Woods used have mostly been spalted beech, walnut,cedar, pecan, cherry, mulberry,poplar, and holly.
John P
Chesapeake, VA

Here's a photo of a Ambrosia Maple bowl I just finished. Watco finish but still needs to be buffed. 12" by 3.5". This was alcohol dried and was a log 3 weeks ago. Thanks for looking and all comments and critiques welcome.
Tony
I had to start the post with my favorite feedback message because of this one sentence, "I have been using the paper bag and wet chip system for some time and last week took 2 cherry bowls out to check them and threw them in the burn pile." That pretty much sums it up for me.
Email 12/14/2005
Dave I have started using the alcohol soak. I have about 6 bowls wrapped now and finished one cherry bowl. 14" and 2 1/2 deep. Soaked it for 3 hours and set aside for a couple of weeks. Last night I unwrapped it and was surprised it did not look like a potato chip. I have been using the paper bag and wet chip system for some time and last week took 2 cherry bowls out to check them and threw them in the burn pile.
The one I soaked had no cracks and did not warp much at all. I had no trouble retruing the bowl what so ever. I have a oak burl and 4 walnut bowls drying now.
Will keep testing and let you know. As of now I love the system.
Dick Hines
Email 3/27/05
Alcohol Bowl Drying Results
Kevin Gerstenecker
Alcohol Bowl Drying Results
Kevin Gerstenecker
Dave, here are my results of my experience in drying green, rough turned bowls using your method involving Denatured Alcohol. To say I have been impressed with the success of this method would be an understatement. Listed below are the techniques I have found that have provided excellent results for me.
To date, I have roughed and dried, from green turning stock approximately 45 bowls. (There may be a couple that snuck by me when keeping track of my progress.) ;-)
Species: Using the Alcohol Drying Method, I have dried the following with excellent results:
Apple - Both Crabapple and Fruiting Tree Wood
Ash - Green Ash, White Ash
Beech
Box Elder
Bradford Pear
Cherry - Black Cherry and Pin Cherry
Cedar - Eastern Red Cedar
Dogwood - 1 small piece
Elm - Chinese, Red
Hawthorn - Washington, Cockspur
Maple - Silver, Norway, Red
Osage Orange
Sycamore
Walnut - Black
Problem Species: The only problems I have experienced using the Alcohol Drying Method have been with Ash and Walnut. I have roughed, soaked and dried about 8 Ash Bowls, and I have had some cracking in the end grain area of each bowl. To date, only one has been severe enough to not be able to turn the cracks away during the finish turn. Most of the cracking is light, and shallow. I have different wall thickness on my rough turned bowls, but it seems to make little different. All of the Ash Bowls have been above 6" in size. I have one Natural Edge Ash Bowl drying that showed cracking within 8 hours of removal from the Alcohol. One Walnut Bowl has some end grain cracks as well, but I have hopes they will turn away during the finish turning process.
Wall thickness: I think it is very important in the success of this drying process to pay attention to wall thickness of your rough turned items. On bowls up to 6" in diameter, I try to maintain a 3/8" to 1/2" wall thickness on the rough turned bowl. I have found on some species, where movement is limited, that is not necessary, and on other species, like Apple, it is essential to have good thickness due to the severe movement of that species.
On larger bowl, of which I have used the Alcohol Drying Method on bowls up to 15" in diameter, I try to maintain a wall thickness of 5/8" up to 1", depending on the species. (As a side note to the Ash bowl cracking problems, those were all larger bowls, in excess of 6", and had thick walls, at least 3/4 or more. I think wall thickness, in this case too thick, is a direct contributor to the cracking I have experienced. Others I have talked with have dried Ash with no problems.)
My Process: Here is the process I use drying my green, rough turned bowls using a Denatured Alcohol Soak.
My blanks are cut round on the Band saw, and turned right away. I rough turn the bowls, and either blow them clean with air, or brush away any dust and shavings, to help keep the Alcohol debris-free.
I submerge the rough turned bowl in Alcohol immediately after they are rough turned. If they tend to float, I use scraps of Corian placed in the bowl to hold them under the Alcohol. I soak the bowls standing upright, as they would be when finished.
I soak all of my rough turned, green bowls a minimum of 24 hours. This is mostly due to convienience for me. If I turn a bowl on a weekday evening, I soak it, and remove it the next evening after work. On the weekend, I just remove it the next day, but it is more times than not a 24 hour soak. My results have been so good, I will continue this timeline.
Upon removal of the bowls from the Alcohol, I wipe the exterior surface lightly with a paper towel, or shop rag. I wrap my bowls immediately using brown grocery bag paper, and I secure the paper with one wrap of masking tape around the exterior of the bowl, near the rim. I always make sure the paper is folded tightly over the rim in into the inside of the bowl about 1/2" to 1" or so. I trim away any excess paper inside the bowl that could impede proper air circulation.
I dry my bowls on a plastic shelving unit that has grate-like shelves with large openings. The bowls are dried bottoms up, with the interior facing down, like Dave suggests. I also write the date on the masking tape on each bowl, so I know when it was removed from the Alcohol for drying. I have finish turned small bowls in as soon as 6 days of drying, but I now wait at least 2 weeks, and I have been unwrapping the bowls after 14 days and letting them air dry "naked", facing down, for another week, or when I can get to them. I find no problem doing it this way, as the bowls are dry enough after 2 weeks to be problem free. Another thing I think contributes to the success I have had using Dave Smith's Alcohol method is the environment where I dry my bowls. I have a basement shop, and I feel that the conditions in my basement are perfect for drying these Alcohol soaked bowls. It stays cool, without a lot of air circulation directly on the bowls. The humidity is constant, but not really high, as I use a dehumidifier. The humidity is still a bit high though, as it is in most basements. With a dedicated shop in the plans, I will still be drying my Alcohol soaked bowl in my basement, as I think the environment there is ideal for the task.
In summary, I have had what I consider excellent results in drying rough turned, green wood using this method. Some of the wood I have used this on was turned as soon as 1 day after being harvested, and without saying, it was VERY wet. Literally "dripping wet" in some instances. I have had very little movement in the finished bowls I have turned using Dave's method. The bowls that did exhibit some movement were turned before a minimum 2 week drying period. Some of the historically "difficult" woods to dry, Sycamore and Apple come to mind, have been the most problem free for me. On the bowls that I have allowed 2 weeks or more for drying before the finish turn, have had no movement, or movement that is hardly discernable.
Dave Smith should be highly commended for bringing this technique to the turners of the world. It is very effective, and I will not turn green wood without an Alcohol Bath waiting. This method helped me fill last years Christmas Bowl Orders before the holiday deadline, of which would have never been possible otherwise. This has brought much joy and satisfaction to my "turning affliction", and I am forever grateful for the foresight and work Dave has put into this technique. I am even more grateful for Dave's visit last October when he told me about this process. I have been using this method since, and I will use it as long as I am turning. Good Lord willing, that will be a long time!
Thanks Dave!!!!!!, you have made a pleasurable experience just that much more enjoyable. For that, I offer my heartfelt thanks!
Email 4/29/2005
Dave,
I tried other suggestions for drying such as dishwashing detergent, and boiling. I did not have a lot of success with these methods so I went back to coating my bowls with Anchorseal and setting them aside to dry for a long time span. When I heard about your new method I decided to try it because of the reliable turners that had used it for a year, and recommended it. I have had remarkable success with it, recommended it to fellow turners, and as you know I let turners know about it on the web. I appreciate your work in developing the method of using DNA, and letting us know about it, and I am impressed you did all of this with no profit comming to you. Thanks Dave, from South Georgia. If you are ever in this neck of the woods stop by and visit.
Glenn Hodges
Nashville, Ga
Email 10/17/2005
Ultimate alky test
Ultimate alky test
Hey Dave.
I've been using your alcohol soaking protocol for several months with great success. When I came across a Pear downed by hurricane Katrina, I snatched it up. It had a cluster of 2 crotches side by side that I just had to try a hollow form from the entire cluster. I'm not sure if you remember me posting it on SMC and the WOW sites. To me, it was the ultimate test for the alky soak, and it worked like a charm! The turning has a total of 6 piths around the circumference, every single one came through perfectly intact. I was discussing it with Jim Ketron in chat, and told him it could be the poster child for alcohol soaking. I just wanted to drop you a line of Thanks again, for bringing this out.

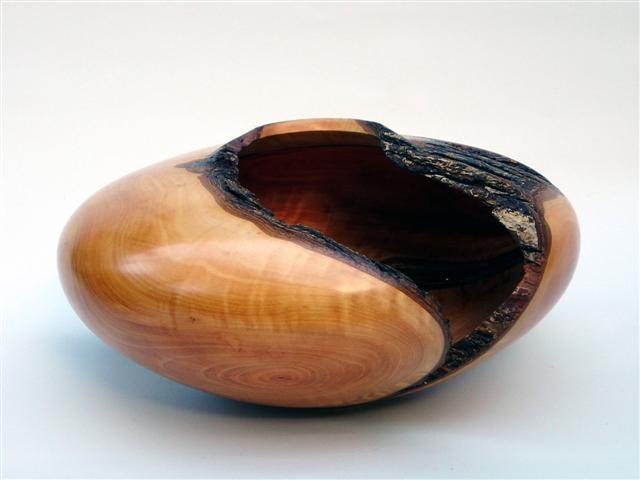

Sure, you have my permission to put it on your site, that would be great. The finished size ended up at 10.5" in diameter x 5.5" tall, with wall thickness just over 1/4". I had roughed turned the walls between 1/2" and 5/8". It was soaked about 24 hrs. If I'm not mistaken, it was a total of 17 days from the time I wrapped it until I took the finished pics.
Travis Stinson
Email 3/19/2006
Hello,
My name is Jeff, I am from Massachusetts, I found your site about a year ago. You know looking for a way to dry wood faster and effectively, ethanol alcohol works very well. I've done big bowsl to vessels, big and small. I just wanna say Thank You!!! for putting up such useful information! I could not find ethanol any where that had it in 95% or better. I had to go on line and order it $135.00 for 5 gal. The only problem wood I had was modrone burl from OU, but that was do to human error not the ethanol.
Thank You again,
Jeff
*Note to the reader.*
Read the Alcohol Source article for info to locate a source for denatured alcohol with a high ethanol content. Do It Best has Sunnyside denatured alcohol in 5 gallon containers for $41.49. Some affiliates will take free delivery of on line orders.Posted 5/28/2006 on Woodturner's Rescource Woodturning Forums
For the last month I have been using the DNA method for drying and wanted to pass along the results.
Quantity 11 bowls rough turned 1" thick for every 12
" in diamiter. Placed in bucket of DNA overnight, then one hour drying on rack, then bottoms covered in craft paper placed upside down for 2 weeks.
Wood used Maple, Birch, Chestnut, Mohagany.
Results: on all pieces noticed less wood movement, all dry after 2 weeks, one piece of birch cracked alittle, but not sure if the crack was already there or not.
This is my new preferred method and will use this now on for green turnings. I get quite a bit of free green wood and now always have dry rough turnings to finish is great.
Just a little info to pass on.
Larry
Yakima, WA.
Posted on penturners.org
6/1/2006I read your article over at WoodCentral 'bout a year ago on using DNA, experimented around with it, and have used it countless times since. I also introduced it to a number of our club members in a Saturday demo I did on drying wood. Even had a chemist friend at the demo (when mentioning 'bonding water and alcohol I needed someone much smarter than me :)
Your process has worked amazingly well for me.
Sorry, didn't mean to ramble on in the ad area (did I mention I am totally impressed with your process/work :)
6/2/2006
And you are more than welcome to add my post to your blog.
I would add pictures but the bowls I have completed have (happily) been sold
Woods used have mostly been spalted beech, walnut,cedar, pecan, cherry, mulberry,poplar, and holly.
John P
Chesapeake, VA
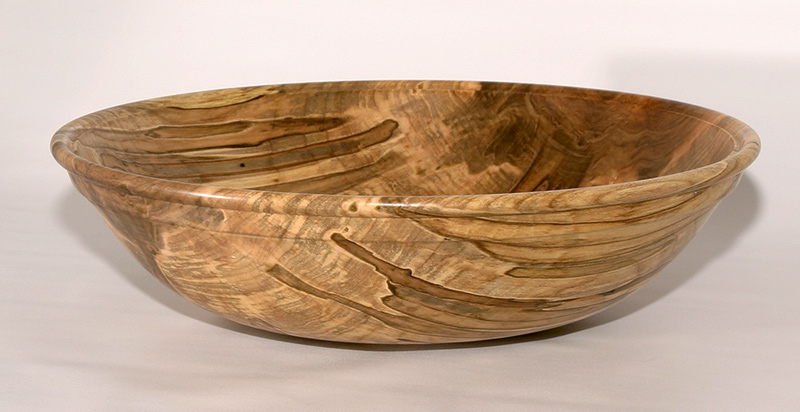
Here's a photo of a Ambrosia Maple bowl I just finished. Watco finish but still needs to be buffed. 12" by 3.5". This was alcohol dried and was a log 3 weeks ago. Thanks for looking and all comments and critiques welcome.
Tony
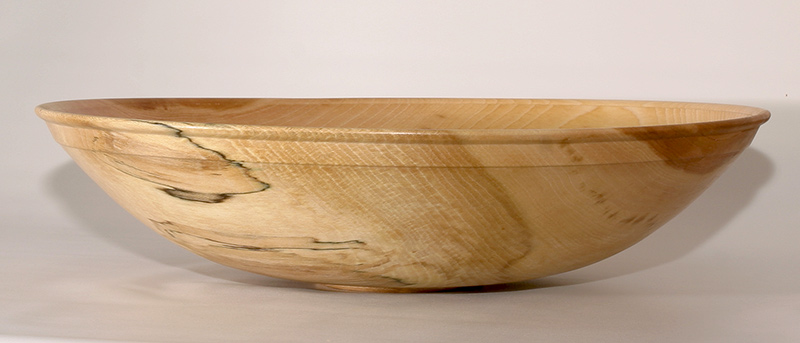
Sycamore bowl measures 14.5" by 3.5" Wall thickness is a heavy 1/8". Bowl weighs 13 ounces. This is another alcohol dried piece. Sycamore responds well to this method of drying. Watco finish. I think on the next one I'm going to try bleaching the wood. Does Sycamore bleach well? As usual all comments and critques are welcome.
Tony
There are many more feedback messages to be posted.
Send in your feedback too.
Send in your feedback too.
posted by David R Smith @ 2:46 PM
![]()


0 Comments:
Post a Comment
<< Home